Sunday, January 31, 2010

The Tale of the Furnace and the Harp

It all started on a frosty winter day in December. I had brought my harp down to Lyon & Healy (conveniently located right here in Chicago) for an overdue regulation. Regulation is where the technicians at Lyon & Healy check the harp over, adjust all the mechanical parts so they are working well and so the harp is in tune in all pedal positions, and change any strings that need changing (usually all the lower strings, the wire strings, are changed at this time). I love to look around the showroom when I am there, looking at all the lovely harps, dozens of them, and in particular, drooling over the Style 11 Gold Concert Grand with it's 1919 style, flower motifs, and all that gold! (Well I can dream can't I?!)

I happened to notice a large vent that appeared to be pouring out humidity into the room. I asked Steve, my favorite harp salesman who took care of my regulation details, if that was the case. He explained about the need for humidity for harps so that the wood does not get too dry, and reminded me to be sure our humidifier was on now that it was winter. I went home and asked Paul to have a look and turn it up.

This is where the trouble began, and what followed was almost a comedy of errors, with Paul realizing that the valve to the humidifier water was apparently clogged (he replaced it), me scheduling furnace maintenance on a Friday in January (never do that!), the repair company basically killing our furnace but refusing to do right after that, and us needing to replace the furnace and having to go the whole weekend without heat!

We were blessed with the following:
  1. A warm January for Chicago (meaning - temperatures about 25-30 degrees, as opposed to the below-zero January weather we often get).
  2. Two propane heaters that Paul and Robert used on Boy Scout camping trips. These heaters travelled about the house with us. In the sitting room and dining room during the day, upstairs at night.
  3. Our bathroom heater-fan (at least we were warm when we showered!).
  4. New electric blankets.
  5. A warm stove.
  6. The fireplace in our parlor. And Snugglewood.
  7. A temperature inside the house that stayed above 40 degrees even though it was much colder outside.
  8. Robert's friends, who let him sleepover all weekend, so we could shut off his room and not have to worry about heat in there.
  9. A heating pad, used to warm cold feet while watching TV, afghans for the rest of the body.
  10. Hot tea.
  11. An excellent experience with the Home Depot in Glenview - we went there on a Saturday afternoon and spoke with a really nice staff member, got a man to come give us an estimate at 5:00 that evening, got the new furnace installed Monday morning.
Finally the world has recalibrated itself, and we are warm and toasty, with humidifier working well. I sure hope my harp appreciates the trouble we went through!

Monday, January 25, 2010

Homemade VS. Store-Bought Ice Cream

Paul and I have been working very hard to reduce expenditures, stop using credit cards, and to get out of debt. This is going well, but it is an adjustment. Now if there is only $40 in the checking account before payday on Thursday (our situation this week!) it is a lot easier and well, completely necessary, to be inventive for things that have to wait to be bought. We are already doing a lot of baking of bread and cookies, not going out to eat or getting take-out, and we have run out of coffee so have been going without it for a week (ah, tea, thank you for saving me!).

Anyway, we're all getting a little tired of chocolate-chip cookies, so, on Saturday night I realized we had ingredients for homemade ice cream. We already had an electric ice cream freezer tucked away on a shelf in the basement, and still had the freezer bowl in the downstairs freezer compartment of our old fridge, so we were all set. I used a very simple recipe:

2 eggs
3/4 cup sugar
2 cups whipped cream or heavy cream
1 cup milk
2 tsp vanilla

Mix eggs and sugar in a mixer. Add whipped cream and milk, then vanilla and mix well. Pour into ice cream freezer. Let ice cream maker run for 20-30 minutes, until ice cream is frozen. Makes 1 ¼ quart.

But it all got me wondering - is it really a savings to make your own? I had my doubts, given that whipped cream is not all that cheap. However, being the fussy ice cream gourmets that we are (only Edy's or Oberweis ice cream is good in our books), I thought it just might be a savings. So I took a look at a grocery receipt and did some online price comparing. I won't bore you with all the details and math calculations I went through, except to note that I buy pure vanilla at Sam's Club in the 16 oz bottle which is gazillion dollars of savings over buying the little 2 oz. rip-offs at the grocery store (to the tune of 1/10 of the cost of grocery store vanilla), but I found that homemade ice cream is much cheaper than full-priced Edy's and only slightly cheaper than even buying Edy's on a Buy-One-Get-One-Free deal:

Total for Homemade Ice Cream Ingredients, for the recipe's yield of 1 ¼ quart: $2.53 per 1 ¼ quart. However, I needed to figure this based on the amount in an Edy's Ice Cream tub so it is $3 per 1 ½ quart
Edy’s regular price 1 ½ quart: $6.49 (or $3.24 if you find it for a buy-1-get-1-free)

The other advantage to homemade ice cream is the all-natural ingedients. So, I have decided to mainly do homemade, but in a pinch, I could get Edy's as long as it's on the Buy-1-Get-1. Can you tell I love ice cream?

Vintage Baking

...well, sort of. I used the Bosch mixer with dough hook (from my previous post on Modern Baking) this year for some Christmas baking. I made two recipes that were taught to me by Paul's grandmother (Babi - pronounced Bubbee) around the time we were married. Paul absolutely loved Babi's cooking and baking. She had given me the recipes for Rohliky (crescent rolls) and for a Czechoslavakian bread that is so yummy. There's also a recipe for a coffee cake that Babi didn't teach me, but Paul had the wisdom to jot it down so we still have it today.

Babi had demonstrated the kneading and had given me explicit instructions on the procedure for making these. It was very labor-intensive. I had made these early on in our life together, but once we had all three of our children, I never tried it again. The thought of all that kneading/resting/rising was hard to imagine with little ones running about. However, with the new tool of the mixer and dough hook (which was not available, at least in a useful form for heavy doughs, back then), I felt emboldened to try again. However, I did do at least one thing that was vintage - I sifted the flour. Babi had specifically told me to sift the flour, even the pre-sifted kind. I had broken my sifter years ago, so needed to buy a new one. The best reviews (at least in my judgement) came for this type of sifter:

Hand-crank Flour Sifter

I set Paul and Tyler to the task of being my sifters, to Tyler's great delight, what fun! I had mixed success. The Rohliky: I think I over-mixed it, and, in spite of all the butter already in these, I needed to use more in the part where I brush the rolled out dough with butter! Here's a photo of some of them (I would have taken a photo of a whole pile of them, but by the time I thought of it, most of them had been eaten!):

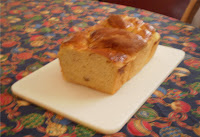
The bread, which is a raisin-almond bread came out very nicely. The recipe makes three loaves. I brought one loaf to Christmas at my sister's house, and gave a loaf to my in-laws (Babi was my mother-in-law's mom, and she was very happy to have this again). The last loaf was for our house, and it went very quickly. Here's a not-too-in-focus photo of our loaf (and it is really terrible focus - don't click on this photo, unless you want to feel dizzy!):


I was very happy to do this again and in a simpler way.

Friday, January 1, 2010

Modern Baking

I love homemade bread. I used to make bread by kneading it by hand, using two risings - Oi! It was an all-day affair. But after hearing about modern bread making techniques, the whole process is infinitely more simple. This has been especially advantageous in these troubled financial times; making one's own bread is not only more nutritious, it saves money, especially if the ingredients are bought in bulk.

I have finally gotten my breadmaking down to a system. I have made bread with this recipe long enough now that I have memorized the proportions. With the Bosch mixer and dough hook, I can whip up dough easily. The technique I use is identical each time too (There was an instructional DVD on using the dough hook that came with the mixer when I ordered it from Pleasant Hill Grain and I use their technique for the most part).

First, I take my 3/4 cup measuring cup and measure five scoops of wheat berries into the Nutrimill grain mill and grind them into flour. This results in about five 1 cup measures of flour. While that is grinding, I heat water in my electric tea kettle (I heat enough for my recipe plus enough for a cup of tea for me - I love to have a cup of tea to sip while I bake). I measure 10-12 ounces of cold water into a 20 oz (2 1/2 cup) measuring cup. Then I add the boiling water to the cool, and check the temperature with a candy thermometer so that it is somewhere between 110-120 degrees. I measure 1/2 cup of oil and 1/2 cup of honey and put it into the mixer, then I add the heated water to that and let the mixer stir it for a little bit. I then add two tbsp yeast and mix (I buy yeast in large packages from Sam's Club). Pleasant Hill Grain also recommended adding 2 tbsp gluten flour to help the bread rise, but I found out a few weeks ago, when I ran out, that the bread does fine without it.

Next is the flour adding technique. I add two cups of bread flour (also bought in huge bags from Sam's - tremendous savings if you bake bread a lot) and two cups of the freshly milled wheat flour. I mix it up for a bit until it looks like batter. Then I add one more cup of wheat flour and a heaping tbsp of salt. I let this mix for about a minute, and then it is time to gradually add the remaining flour. While the mixer is running, I add wheat flour, 1/2 cup at a time until it is gone. (Pleasant Hill Grain has you not worry about exact proportions, just add the flour just until the dough no longer sticks to the side of the mixer. However, I found that the total of two cups bread flour/five cups of wheat flour used in my recipe is the exact right measurement for this recipe.) Then I set a timer and let the dough hook knead it for 10 minutes.

The next step is a real time saver. Because this dough hook does such a good job, there is no need to do two risings. Once kneaded, I just dump the dough onto an oiled surface, divide into two halves, shape the loaves (flatten out, fold over in half, fold in the ends, than fold in half once again, and tuck the seam into the dough), and place into bread pans that have been greased with Crisco, seam down. The bread only needs a half hour, maybe a bit more. Then, into a pre-heated 350 degree oven for 35 minutes. I have not yet had a failure using this system, and since it is memorized, it is not a stress at all, the mixing up can be done very quickly.

Here are the ingredients in traditional format:

Honey Whole Wheat Bread

5 cups whole wheat flour
2 cups bread flour (or all-purpose)
2 1/2 cups warm water
1/2 cup oil
1/2 cup honey
2 tbsps yeast (or two packages)
1 heaping tbsp salt