Showing posts with label Costuming. Show all posts

Wednesday, September 26, 2018

Bedroom Woodwork (with Regency Fashion!)

One of the last rooms to be finished in our fixer-upper is the master bedroom.  We had wallpapered the walls years ago (20 years?!), and that is in need of an update.  Paul had added window and door casings (we had the original design reproduced in oak).  But we didn't have baseboards in our room since the original pine ones (that were in horrible shape) were removed - 30 years ago - when we had gutted the upstairs.  Finally though, this summer, Paul installed the baseboards!  They are beautiful.  And this week the wallpaper is being changed.  So I am happy.

I happened to be dressed up for Book Club the day Paul finished them.  I was dressed in Regency for our book choice: Northanger Abbey by Jane Austen.  I wore my Michaelmas dress, that I finally finished (when I wore it for my Michaelmas Party, the "innards" weren't finished (seam finishes around the armholes, tacking down of the back fastenings, etc. and the hem was atrociously put in - I literally machine basted the worst-hem-ever.  Now all is finished and properly hemmed.  It was nice to wear the dress again, with my short stays, and have it be complete.  I also wore my Regency slippers from American Duchess.  I posed my foot by the new baseboards!

Northanger Abbey Dress

"Dashwood" Regency slippers from American Duchess

Close-up of the baseboards, with the outer corner blocks

Monday, February 6, 2017

Doctor Zhivago Inspired Edwardian Outfit

For Book Club this quarter, we read Doctor Zhivago by Boris Pasternak.  It is a long book, but good for cold winter days.  The novel is set in the years 1903-1940's, but the majority of the book takes place in 1903-1920's.  I was inspired to put together an Edwardian ensemble with a Russian flair.  I also channeled my inner geology geek putting together a little box of minerals as a prop (see this post for that).

I'll post from the inside-out:
  • Undergarments - If I had more time I would have finished my Edwardian Corset Cover that I had started so long ago.  So I just wore my older Edwardian undergarments.  I did make one tweak though - I had gotten my Erté Titanic Overbust corset from Period Corsets back in 2012.  It came with two sets of lacings for the back: one for the top-down and one from the bottom-up, meeting in the middle.  This makes it difficult though if one wants to lace themselves in.  Since I like to wear my corset during the week before an event to get acclimated to it, it is difficult when no one is home to help, as a two-laces corset requires (for the most part).  So I contacted a representative from Period Corsets, and she very kindly sent me a single long lace, which I re-laced my corset with.
  • Blouse - I purchased an Edwardian reproduction blouse from Cotton Lane on Amazon.  It's very pretty.  I ordered a larger size (I have football-player-shoulders), then took in the sides.
  • Skirt - Oh dear...this was a problem.  I used Rocking Horse Farm pattern #903 (Caution: Do Not Use This Pattern!  Ever!!) that was simply horrible.  The pattern lines for my size did not match up properly, I had to tape together the size small in order to see what they actually intended.  Even with that there was this odd extra fabric on the bottom front that was completely illogical.  There were no dots on the waistband pattern piece - needed for matching to the waistline of the skirt.  There was also a pleat marking missing.  The cut lines for it were on the pattern, and the markings were drawn on the suggested (tiny) pattern layout picture, but not on the pattern itself.  I spent a lot of hours trying to redraw, adjust, improvise.  The result was okay - from the outside.  On the inside there were problems.  It looked okay, but I was very frustrated with the lost time and aggravation of using a terrible pattern.  I will have to write a review on GBACG (Greater Bay Area Costuming Guild).  They have a Pattern Review section.  I so wish someone had reviewed this before and saved me the hassle of working with a dreadful pattern.   


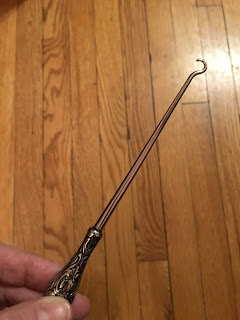
  • Boots - The darling, lovely Manhattan Button Boots from American Duchess!  I love these.  Customer service here was also very helpful with the sizing.  My foot is long but narrow, and their shoes tend to run a bit large.  They gave me good advice on sizing and the boots fit perfectly.  Button hook needed! 

  • Hat - I bought a faux fur hat on sale from Fabulous Furs.  All of their products are faux.  This hat is very warm.  
  • Coat - my coat is a modern-day coat, but I was happy to be able to match the faux fur of the hat with that on the coat.  

Book Club was lots of fun.  The ladies liked my outfit, and even chuckled at my very bad, well-intentioned Russian accent.  I only said a few sentences in my fake-ey accent!  Hello in actual Russian, and then some key phrases I put together watching YouTube videos, and here's a funny way if you need a fake accent in a pinch: Go to Google Translate.  Type in the sentence you want in the first box, making sure you select English as the language to detect.  Once your sentence is complete, change the language in that same box to the language you want to hear, and click on the audio clickable at the bottom of that box.  You'll hear the English words, but with an accent of the language you changed the "Detect Language" to.  It doesn't work with all languages, but did pretty well for Russian.

Thursday, January 26, 2017

Disorganized Sewing/Robert's Room

I have two sewing projects on deck.  The trouble is that right now my home is not completely conducive to successful sewing.  Yesterday I wanted to get started tracing an Edwardian-era hobble skirt, and cutting bias strips to finally finish a quilt I started many, many years back. Step one was clearing off the dining room table - a Herculean task.  But it was done, wiped down, and worked commenced.  I was able to trace the skirt pattern yesterday.

The bias strips however, ran into a snag.  We have been, over the past, oh, six months or so, been doing some work on Robert's old room.  You see, Robert now lives in Portland, so the room is to be a guest room (and Robert's room when he comes to visit) and also a sewing room for me.  I've never had a sewing room before, and I long to have one.  But his closet was in need of repair (walls cracking, not insulated, cold), including a "secret passageway" that Tyler wants put in that leads from his closet to Robert's.  Fun, and has sort of a Narnia aspect to it (Mr. Tumnus?!).  So far the closet is insulated and has most of its wallboard.  All that remains is some electrical and the passageway door.  But we also needed to replace the ceiling in the room itself.  Right now the old ceiling is out, and 70% of the wallboard is up on the ceiling.  A paint job and new baseboards will follow (pre-stained oak this time, so all that needs to be done is the cutting and fitting).  But my sewing stuff is scattered to the four winds, including my iron.  Hence, the difficulty going forward with the bias strips.  So once I get all of my projects to the sewing stage, I will not have an optimal sewing space yet to do them.  Not really much different from when my sewing machine was in the dining room.

No one seems to know where the iron went.  To be honest, it is quite old, and I am tempted just to buy another.

My skirt project is for Book Club.  We are reading Doctor Zhivago.  I want to wear an Edwardian skirt and blouse ensemble, and I have my eye on an awesome faux fur Russian hat.  More on that in a future post.

Rocking Horse Farm #903 
Edwardian Hobble Skirt


My quilt - circa 1988

Thursday, November 19, 2015

My Downton Abbey Dinner

At last I have the blog post of my Downton Abbey Dinner!  It was a lovely evening.  My family was amazing in the help and acting they provided.  Of course, there were a few snafus, but we worked around them, and the evening went smoothly.

I'll start from the beginning, showing how the evening progressed.

The Arrival:

Our "butler" stood outside on the front porch to welcome guests.  We had the American flag on our flagpole above, but we also hung the Union Jack on the porch near the butler.

Paul played Carson.  However, a small snafu detained him from the initial answering of the doorbell. (There was a mistake with our entree - not enough was made as we ordered!  He and Robert ran out to get the revised order right before the evening started.)  However, our butler-in-training, Mini-Me Carson (Tyler) subbed for Carson, and did a brilliant job of it ("Might I take your coat, mum?" and "Here is your champagne punch, mum" in a very authentic-sounding British accent!)

Mini-Me Carson (Ty) and Lady Mary (Julie)


Then it was time for the first game.  I spent a lot of time preparing what I called "Downton Abbey Easter Eggs" or "Hidden in Plain View".  This was where I placed reproductions of items or beings that appeared in the show out in the various rooms, along with other antique-like items.  The guests then needed to figure out which of the many items that were in and around the rooms were actually related to the show.  This was probably the most enjoyable aspect of the planning.  I needed to make some of the reproductions, which really tapped into my creative side.  

Game One:
While the ladies hunted for the objects, I played three harp pieces for them: Adagietto by Damase, Nadir's Song from The Pearl Fishers by Bizet, and an arrangement of Downton Abbey Suite by Lunn that my harp teacher and I adapted for harp.  I am wearing my Downton Abbey Dress that I had made previously for another event.  

This was one of two favorite Easter Eggs that I placed out.  I found instructions for this craft on this website, although we altered the bell to be an actual doorbell (non-functioning, just for show).  Paul made this for me.  I did the spray painting, but he did the rest, carefully pre-drilling holes for the doorbell, the clip, and the nail that went into the wall, and adhering the name plate to the wood.  It is still hanging on the wall, and I think I will keep it there, periodically changing the note to the butler as the occasion suggests.  

Here were some other Easter Eggs, see if you know which episode they are from and what was going on in the show around them: a bar of soap, a (reproduction) painting by Piero Della Francesca, a telegram (see below for text), a letter opener, a syringe, some letters, a train ticket (also see below), a fan, and a poster about a vaudeville act.  

Telegram

Train Ticket.  
This was my second favorite Easter Egg.  I made it using Word, and it was not easy!  I only had the photo below to go on, but it was really fun trying to duplicate it.  


This telephone was not originally intended to be an Easter Egg; I bought it to add to the ambiance, but many ladies guessed it, and it did appear in the show after all.  


Isis.  Tyler inherited her once the party was over. 


Baby Marigold.  
My doll is always in my parlor, but I added a silk marigold bouquet to hint at her identity.


Then it was time for dinner.  My faithful staff (Paul, Kristin, Robert, and Tyler) worked behind the scenes.  Lady Mary (Julie) dined with us, amusing us Violets and Isobels with her youthful company.  We played another game between the first course (split pea soup) and the second (Asparagus Salad with Champagne-Saffron Vinaigrette, recipe here) called Match the Quote (link here).

The Dinner:

The dinner table.  Julie had rescued me from the wrong tablecloth. (I discovered that day that I had ordered the wrong size; she ran out that afternoon and bought me one that would fit our table with both leaves in.)

A brass servant's bell brought our staff to our table.  We had pesto ravioli (Maggiano's, who made good on the whoops regarding mistake on the size tray we wanted in a most generous way) and Walnut Carrots with Honey Glaze (recipe here).


Between dinner and dessert we played our last game, Downton Abbey Trivia (link here).  Our dessert was Chocolate Toffee Mini-Trifles (recipe here).   And then it was time to depart.  

The Ending:


My wonderful "staff".  Tyler, Robert (the footman Albert), and Carson (who also acted as a footman during dinner - gasp! and poured the wine).  Mrs. Patmore (Kristin) was too shy for a photo.  


The Aristocratic Ladies (Violets, Isobels, and Lady Mary).  Note the hats and tiaras.

And one more with Mini-Me Carson.

We all had so much fun with this.  It was a lovely evening, and in spite of the effort, I am looking forward to our next big event.  It was just so nice to travel into the past!

Monday, November 2, 2015

Haunted Forest 2015

Again this year, we set up a Haunted Forest in our backyard for Tyler, his school friends, and our cousins.  It was lots of fun (and lots of work!), but all went well, and I think everyone had fun.  Thanks to Dawn for taking photos.  Here are some highlights:

Ty with one of his cousins

Ghosts in the Graveyard!

Kristin and Paul behind the scenes, 
getting a scary Chuckie doll ready to swing out into the path.

Action shot of terrifying Chuckie.

Robert scaring an unsuspecting traveler on the bridge.

Me in the graveyard as a Weeping Angel.

After he went through the forest (he'll never be the same again!)


Monday, March 16, 2015

How To Make A Majora's Mask


Tyler wanted a Majora's Mask, from the video game, for one of his Christmas presents this past Christmas.  We foolishly thought we could simply go online and buy one.  No.  The only ones available were art pieces that cost hundreds of dollars.  So, the combined talents of engineer Paul and artist Julie, brought forth a miracle.  I wanted to post how they did it, so that other parents, futilely searching for an affordable Majora's Mask, might be able to follow this plan and make one of their own for their younguns.  

For supplies, they started with a trip to Hobby Lobby.  They spent about $34. I have listed the Hobby Lobby sku numbers after each item.  They began with the mask base (white butterfly mask, sku 925149).  Paul trimmed down the bottom, getting rid of the part that goes by the mouth and lower cheeks (see inside of finished mask, at end of this post).  


To get the proper dimensions of the mask, he found a pdf of Majora's Mask and sized it up to the size he wanted for the final mask size.  He then cut the shape of the outer mask from a 5mm white foam sheet (sku 336339) using this resized pdf, and glued it to the mask base (basically a heart shape with points along the edges - be sure to have the points as part of the 5mm white foam, you will color them later) using foam glue (sku 377473).  He and Julie then cut pieces of 2mm colored foam (sku 570192) in the shapes as indicated on the pdf (with the exception of two small areas on the lower portion of the mask which were either left as white foam or colored green with Sharpie, see details at end of post). The layers were: base mask, white foam, purple foam, red foam, then smaller pieces of purple, orange, yellow, and green for the forehead pieces and the eye sockets.


White foam

Colored foam


Foam glue

Julie then painted and Sharpied any colors not already there in foam.  She used white acrylic for white areas (sku 337170), old gold acrylic paint for the upper points on top of head and just below the sides of the eyes, and the triangles above the eyes (sku 344960).


Sharpie markers (sku 603068) were used for the lower points along the sides of the mask, along with the green areas near the green points.


Inside of mask: white foam heart shape with points along top and sides, glued to mask base

The finished mask

Some details on the finished mask: Most of it is made of foam layered on foam, with gold and white paint and Sharpie markers coloring in the white foam not covered by the colored foam.  The only white foam exposed is the white near near the green points.  The green and black there is Sharpie marker on the white foam.  The white accent just under the nose is painted on the red foam.  All of the points are the white foam colored with either gold paint or Sharpie.  The white accents on the forehead are white acrylic paint, and the triangles on the forehead are gold acrylic paint.  Note also that the eyes on the Majora's Mask pattern are very wide-set.  Your child will not be able to see out of the eyeholes that far apart.  Paul simply cut the eye openings in the foam as a more oval shape so Tyler could see out the mask.

This was a *bit* labor-intensive, truly a labor of love, especially for Julie who was up late several nights artistically painting in the various areas of the mask needing paint.  Stay tuned for a future post of Ty dancing in his mask!

P.S. If you have any questions about how Paul and Julie did this, leave a question in the comments section; we'll try to help!

Sunday, September 8, 2013

Lady Audley's Secret

For my friend Colleen's Victorian Book Club (a quarterly meeting of eight ladies who meet to read and discuss Victorian literature), I was inspired to portray a character in the book we read, Lady Audley's Secret.  I did not want to be the main character (read the book to find out why!), rather, I was inspired by her step-daughter, Alicia.  Alicia was a very sympathetic character, as her father's second wife seemed to drive a rift between her and her father.  The fact that she was also a horsewoman fit right in with what was going on in my present day life, Tyler's horseback riding lessons.  Originally I planned on making a true reproduction riding habit bodice, but the pattern was delayed in shipping, and I didn't have much time to begin with.  So I decided to put together a faux riding ensemble that would capture the spirit of Alicia.

I have my Beatrix Jacket (made from the Sense & Sensibility pattern) and a modern black skirt that, when worn with a widening petticoat, looks somewhat authentic.  I had boots that looked like riding boots, a hat that just might look like a riding hat, and I bought a cheap riding crop (because, as you know, a good horsewoman must always be prepared for a ride!).  But I did not have a blouse that would work, and I wanted a new reticule.  I went blouse shopping and found this blouse, which does not look at all Victorian in the picture, but I rolled down and buttoned the sleeves, buttoned the buttons all the way up, added a brooch, and also sewed a little lace on the cuffs.  Voilà, a faux Victorian blouse!  For my reticule, I used this pattern, and just happened to find two different dotty fabrics at Vogue Fabrics that went with the blouse, which went together beautifully, making an adorable drawstring purse. 


Here I am, in all my faux glory, as Alicia:


Lady Alicia, her crop at the ready


Close-up 


The fabric of the dotty blouse


And the little dotty reticule